DIY cookie kits are a fun and convenient way to enjoy baking at home. They typically include pre-made dough, icing, decorations, and easy-to-follow instructions, making them perfect for beginners or those short on time. These kits allow you to create custom cookies for holidays, birthdays, or any occasion, offering a creative and delicious treat for all ages. With step-by-step guides and all necessary ingredients included, DIY cookie kits make baking accessible and enjoyable for everyone, regardless of skill level. They’re a great way to spend quality time with family or friends while creating memorable treats together.

Overview of DIY Cookie Kits
DIY cookie kits are pre-assembled packages designed to simplify the cookie-making process. They usually include essential components like cookie dough, icing, decorations, and step-by-step instructions. These kits cater to both beginners and experienced bakers, offering a convenient way to create delicious, custom cookies at home. Many DIY cookie kits are themed, such as holiday or seasonal designs, making them perfect for special occasions. They often come with pre-made dough and icing, saving time on preparation. Some kits also include decorative items like sprinkles, stamps, or edible markers, allowing for personalized touches. Instructions are typically easy to follow, guiding users through dough preparation, baking, and decorating. DIY cookie kits are ideal for families, kids, or anyone looking to enjoy a fun and creative baking experience without the hassle of gathering separate ingredients. They’re also great for gifting, as they provide a thoughtful and interactive activity. With their versatility and ease of use, DIY cookie kits have become a popular choice for homemade treats.
Components of a DIY Cookie Kit
A DIY cookie kit typically includes everything needed to bake and decorate cookies at home. The core components are pre-made cookie dough, which may be sugar cookie or gingerbread-themed, along with icing bags. The icing is often divided into different colors to allow for creative decorating. Decorations like sprinkles, edible markers, or small candies are also usually included. Some kits may offer additional tools such as rolling pins, cookie cutters, or spatulas. Step-by-step instructions are provided to guide users through baking, cooling, and decorating their cookies. Packaging varies, but most kits come in sealed bags or boxes to maintain freshness. Some kits may also include optional ingredients like flavor extracts or powdered sugar for enhancing the icing. The components are selected to ensure that users have a seamless and enjoyable baking experience. These kits are designed to be user-friendly, making it easy for anyone to create professional-looking cookies without prior baking experience. The inclusion of all necessary items in one kit makes it a convenient option for home bakers.

Preparing Your DIY Cookie Kit
Your DIY cookie kit contains pre-made dough, icing, and decorations. Begin by massaging the icing bags to ensure smooth flow. Lay out all components, including cookies, icing, and sprinkles, to organize your workspace for efficient decorating. Follow the included instructions step-by-step to achieve the best results.
Ingredients and Tools Needed
A DIY cookie kit typically includes pre-made sugar cookie dough or gingerbread, along with royal icing, confectioners’ sugar, and decorations like sprinkles. Tools such as icing bags, spreading utensils, and instructions are also provided. Additional items like almond extract for flavor and decorative supplies may be included. To enhance your experience, gather scissors, a clean workspace, and optional tools like brushes for detailed designs. Ensure all ingredients are stored properly and used within the recommended timeframe for freshness. Follow the kit’s instructions for preparing the dough and icing before decorating. Organize your tools and ingredients beforehand to streamline the process. This setup ensures a smooth and enjoyable DIY cookie decorating experience, perfect for all skill levels. By having everything you need in one kit, you can focus on creating delicious, personalized cookies with ease. Make sure to review the included instructions for specific preparation steps and tips to achieve the best results.
Storage and Shelf Life
Proper storage is essential to maintain the freshness and quality of your DIY cookie kit ingredients. Store the kit at room temperature in a cool, dry place, away from direct sunlight and moisture. If you plan to use the kit within a week, keep it sealed to prevent exposure to air. For longer storage, consider freezing the cookie dough and icing, which can be frozen for up to 3 months. Thaw frozen ingredients at room temperature before use.
Once opened, use the icing and decorations promptly to avoid spoilage. If you won’t be using the entire kit at once, store leftover icing in an airtight container in the refrigerator for up to 2 weeks. Cookies can be baked, decorated, and stored in an airtight container at room temperature for up to 5 days. Always check the expiration dates of ingredients and ensure they are within the recommended timeframe before use. Proper storage ensures your DIY cookie kit remains fresh and ready for a fun baking experience. Follow the instructions provided for specific storage guidelines to maximize shelf life and enjoy your cookies at their best.

Decorating Your Cookies
Transform your cookies into edible art with easy-to-follow decorating techniques. Use icing bags, tips, and sprinkles to create personalized designs. Start with simple steps like outlining and filling, then experiment with advanced methods like layering and detailing. Every kit includes instructions to guide you through the process, ensuring your cookies look as good as they taste. Whether you’re a beginner or an experienced decorator, these tools and tips will help you achieve professional-looking results. Make every cookie unique and special with your creativity and the provided materials. Decorating is a fun way to add a personal touch and make your cookies truly unforgettable. Let your imagination shine and enjoy the satisfaction of creating something beautiful and delicious.
Step-by-Step Decorating Instructions
Start by preparing your icing according to the kit instructions. Massage the icing bag gently to ensure smooth flow. Lay out your cookies on a clean surface or parchment paper. Begin by outlining the cookie with a thin line of icing, creating a border. Fill the center with a thicker layer of icing, spreading evenly with a spatula or knife. Allow the base layer to set slightly before adding details. Use different icing colors or tips to create patterns, stripes, or textures. Add sprinkles or decorations immediately after icing to ensure they stick. For intricate designs, pipe small details like eyes, mouths, or borders last. Allow the cookies to dry completely before serving or packaging. Follow the kit’s specific instructions for tips and techniques tailored to your design. With patience and creativity, your cookies will look professional and delicious!
Advanced Decorating Techniques
For a more polished look, try layering icing colors to create depth and dimension. Use fine-tip icing bags or tools to add intricate details like borders, flowers, or text. Experiment with texture by applying icing in different patterns or using a spatula to create smooth, swirled effects. To achieve sharp edges and clean lines, allow each layer of icing to set before adding additional details. For intricate designs, use a small paintbrush to paint fine lines or add shading with edible markers. Consider using multiple icing colors to create gradient or ombre effects, blending them gently while wet. Add small candies, beads, or sprinkles to create eyes, buttons, or other decorative elements. For seasonal themes, incorporate themed decorations like holly sprinkles for Christmas or pumpkin-shaped candies for Halloween. Practice piping borders, rosettes, and other designs to enhance your cookie’s appearance. With practice, you can create stunning, professional-looking cookies that are almost too beautiful to eat. These advanced techniques allow you to personalize your cookies further, making them truly unique and special for any occasion.
Customizing Your Cookies
Customizing your cookies is where creativity truly shines. Start by selecting a theme, whether it’s for a holiday, birthday, or special event, and match your decorations accordingly; Use colored icings and sprinkles to align with your chosen theme, ensuring each cookie tells a story. Personalize cookies with names, dates, or messages using fine-tip icing bags or edible markers. Add unique textures by incorporating materials like edible glitter, sanding sugar, or even crushed nuts for a rustic touch. Experiment with patterns like stripes, polka dots, or chevrons by layering icing in different colors. For seasonal flair, use themed sprinkles, such as hearts for Valentine’s Day or snowflakes for winter. Consider adding small candies or beads to create eyes, buttons, or other decorative elements. To make your cookies stand out, try combining multiple techniques, like layering icing and then adding sprinkles before it sets. This allows for a dimensional and visually appealing finish. Customizing your cookies not only makes them more visually appealing but also adds a personal touch, making them perfect for gifts or special occasions. With a little creativity, your DIY cookie kit can yield one-of-a-kind treats that impress and delight.
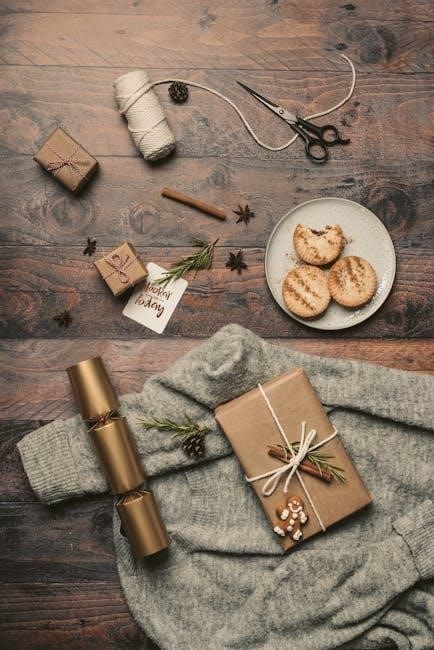
Packaging Your DIY Cookie Kit
Packaging your DIY cookie kit requires attention to detail to ensure freshness and presentation. Use airtight containers or clear treat bags to store cookies, icing, and decorations. Include instruction inserts for easy guidance. Proper packaging keeps ingredients fresh and makes the kit convenient for users. Choose materials like cookie boxes, piping bags, or decorative bags to enhance appeal. Ensure all components are securely sealed to prevent leakage or damage. Clear labeling and attractive designs can make your DIY cookie kit stand out as a professional and thoughtful product. Packaging is the final touch that completes the DIY experience, ensuring everything is ready to use and enjoy.
Materials Needed for Packaging
Proper packaging materials are essential to ensure your DIY cookie kit remains fresh and visually appealing. Start with clear treat bags or airtight containers to store cookies, icing, and decorations. Use cookie boxes or decorative bags for a professional look. Include piping bags for icing and sprinkle containers to keep toppings organized. Add instruction inserts to guide users through the decorating process. Labels or tags with the kit’s contents and branding can enhance presentation. For a polished finish, consider adding twine or gift tags. Ensure all materials are food-safe and durable to prevent leakage or damage. Optional items like gift wrapping paper or ribbons can make the kit more appealing for gifting. Proper packaging not only preserves freshness but also adds to the overall DIY experience, making your kit stand out as a thoughtful and professional product.
Designing Attractive Packaging
Attractive packaging is crucial for making your DIY cookie kit stand out. Start by choosing a design that reflects the theme of your kit, whether it’s holiday-themed, seasonal, or for a special occasion. Use clear treat bags or decorative boxes to showcase the contents, such as cookies, icing, and sprinkles. Add a custom label or gift tag with your brand name or a festive message to enhance the presentation. Consider adding themed artwork or colorful patterns to make the packaging visually appealing. For a professional touch, include a window cutout in the packaging to allow a peek at the contents inside. You can also add ribbons or twine for a rustic or gift-like appearance. Ensure the packaging is not only visually appealing but also functional, with secure closures to prevent leakage or damage. By combining creativity and practicality, your DIY cookie kit will look professional and inviting, making it a delightful gift or treat for any occasion.

Creating a Themed DIY Cookie Kit
Themed DIY cookie kits add an extra layer of fun and creativity to your baking experience. Whether it’s a holiday, seasonal, or special occasion theme, these kits allow you to customize cookies with themed decorations, making them perfect for gifts or celebrations. Include themed decorations and instructions to enhance the experience.
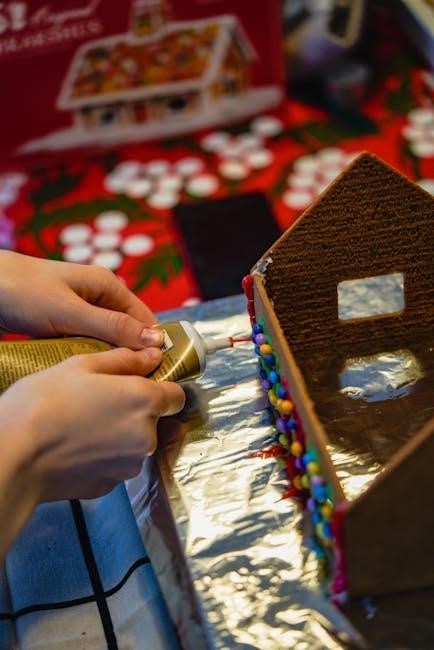
Holiday and Seasonal Themes
Holiday and seasonal themes are a delightful way to make your DIY cookie kits even more special. For example, a Halloween-themed kit might include spooky cookie cutters, orange and black icing, and festive sprinkles like bats or pumpkins. Christmas kits often feature tree, snowflake, or gingerbread shapes, paired with red and green icing and holiday-themed decorations. Similarly, Easter kits might include egg-shaped cookies, pastel-colored icings, and spring-themed sprinkles like flowers or bunnies. These themed kits allow you to tailor your cookies to match the spirit of the season, making them perfect for holiday gatherings, parties, or as thoughtful gifts. Many kits also come with step-by-step instructions to help you create festive designs, ensuring your cookies look as good as they taste. By incorporating seasonal elements, you can make your DIY cookie kit a fun and memorable part of your holiday traditions.

Themed kits are also a great way to involve kids in holiday preparations, teaching them about the joy of baking and decorating. Whether it’s Valentine’s Day, Halloween, or Christmas, these kits provide a creative outlet for celebrating the season. With pre-packaged ingredients and clear instructions, anyone can create beautiful, themed cookies that are sure to impress friends and family. The best part is that these kits can be customized to fit any holiday or occasion, making them a versatile and enjoyable activity for all ages.
Special Occasion Kits
Special occasion DIY cookie kits are a thoughtful way to celebrate milestones and events. Whether it’s a wedding, birthday, graduation, or baby shower, these kits are designed to match the theme of your celebration. For instance, a wedding kit might include heart-shaped cookies, elegant decorations, and instructions for creating romantic designs. Birthday kits often feature vibrant icing colors and sprinkles tailored to the celebrant’s favorite hues. Some kits even allow for customization, such as adding monograms or specific themes to make the cookies truly personalized. These kits are perfect for party favors or as a fun activity for guests to enjoy together. With clear instructions and pre-packaged ingredients, they ensure everyone can participate, regardless of baking experience. Special occasion kits also make great gifts, offering a memorable and edible keepsake for the event. By combining creativity with convenience, they provide a unique way to mark life’s special moments with delicious, custom cookies.

Tips and Tricks
- Plan ahead: Allow plenty of time for dough to chill and cookies to bake.
- Use room-temperature ingredients for smooth dough handling.
- Chill dough before rolling to prevent sticking.
- Dust surfaces lightly with powdered sugar for easy cleanup.
- Experiment with flavors like vanilla or almond extract for unique tastes.
- Keep icing consistent by kneading bags gently before use.
- Store leftovers in airtight containers to maintain freshness.
Troubleshooting Common Issues
When working with DIY cookie kits, some common issues may arise. If the icing separates, gently knead the bag for a few minutes until smooth. To prevent cookies from sticking, lightly dust surfaces with powdered sugar. If royal icing is too thick, add a small amount of water; if too thin, mix in more powdered sugar. For cookies that spread too much during baking, ensure the dough is chilled properly before cutting. If decorations don’t stick, lightly dampen the cookie surface with a fingertip. To avoid air bubbles in icing, tap the cookie gently on the counter. If the icing dries too quickly, work in small sections or cover unused icing with a damp cloth. For uneven baking, rotate the tray halfway through the baking time. If the cookies are too soft, bake for an additional minute. Lastly, if sprinkles don’t adhere, apply them immediately after icing the cookie. These simple fixes will help ensure your DIY cookie decorating experience is enjoyable and stress-free.
Enhancing the DIY Experience
To make your DIY cookie kit experience even more enjoyable, consider adding personal touches and creative elements. Start by organizing a cookie decorating party with friends or family, turning it into a fun group activity. Use themed decorations and music to match the occasion, such as holiday tunes for Christmas kits. Incorporate storytelling or challenges to make the process more engaging. For example, create a contest for the most creative design or the best use of sprinkles. To enhance learning, pair the kit with video tutorials or online workshops that provide advanced decorating techniques. Additionally, experiment with custom flavors by adding extracts like vanilla or almond to the dough or icing. For a personalized touch, include handwritten recipe cards or themed packaging. Finally, take photos of your finished cookies to share on social media or create a scrapbook of your DIY projects. These enhancements will turn a simple DIY kit into a memorable and rewarding experience, fostering creativity and joy for all participants.
DIY cookie kits offer a fun and creative way to enjoy baking at home. Perfect for all skill levels, they provide pre-made dough, icing, and decorations, making it easy to craft delicious, personalized cookies for any occasion.
Final Thoughts on DIY Cookie Kits
DIY cookie kits are a delightful way to bring creativity and joy into your home. They offer a perfect blend of convenience and customization, allowing you to craft unique cookies for various occasions. Whether you’re celebrating a holiday, hosting a party, or simply looking for a fun activity, these kits provide everything needed to get started. The inclusion of pre-made dough, icing, and decorations ensures that even those new to baking can achieve professional-looking results. Additionally, the step-by-step instructions guide you through each process, making the experience stress-free and enjoyable. DIY cookie kits are not just about baking; they’re about creating memories with family and friends. Their versatility and ease of use make them a great option for anyone looking to explore their creative side while indulging in delicious treats.
Encouragement to Try DIY Cookie Kits
If you haven’t tried a DIY cookie kit yet, now is the perfect time to give it a go! These kits are designed to make baking fun, easy, and accessible for everyone, regardless of skill level. Whether you’re a seasoned baker or a complete beginner, the step-by-step instructions and pre-prepared ingredients ensure a stress-free and enjoyable experience. DIY cookie kits are a great way to spend quality time with family or friends, creating memories while crafting delicious treats. They’re also a thoughtful gift idea for loved ones who enjoy baking or trying new things.
What makes DIY cookie kits even more appealing is their versatility. You can customize them to suit any occasion, from holidays to birthdays, making each batch truly unique. The satisfaction of seeing your finished cookies, adorned with your personal touches, is incredibly rewarding. So why not give it a try? Dive into the world of DIY cookie kits and discover how much fun it can be to create something sweet and special with your own hands.